Syncing Your CGM with Your Smartwatch
Feb 06, 2024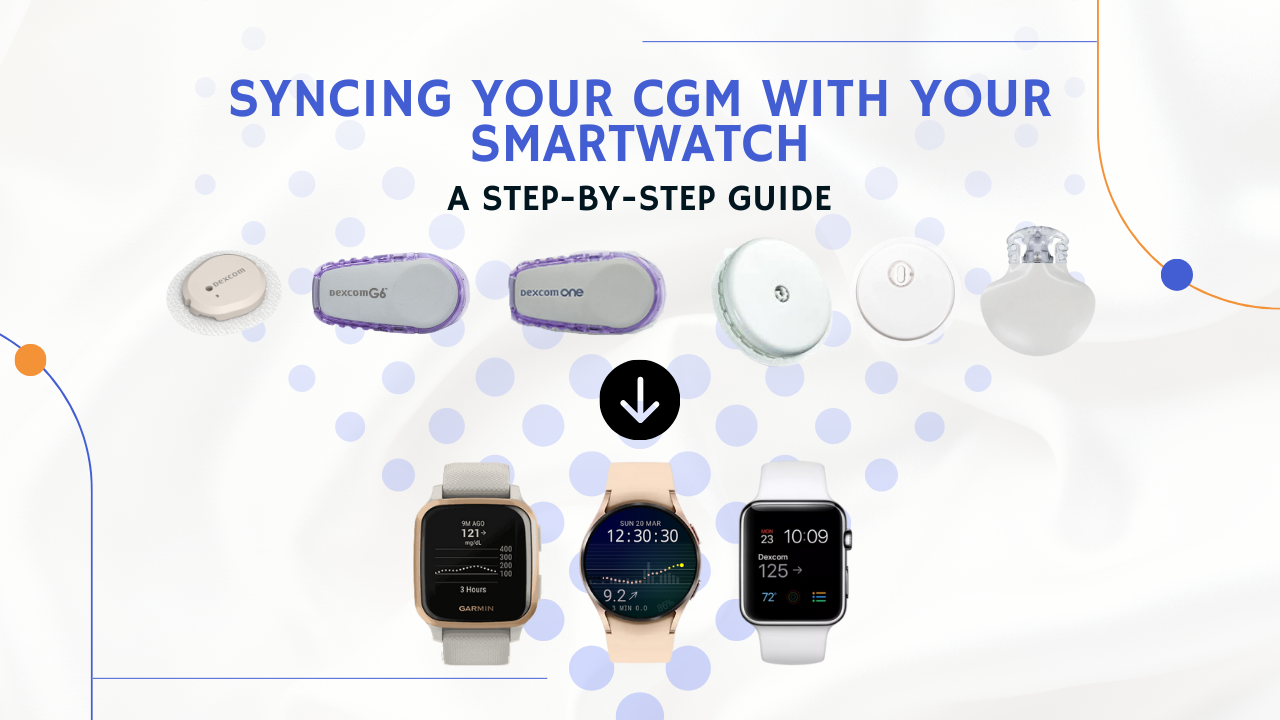
Have you ever experienced the convenience of having your glucose data readily available at just a glance on your smartwatch?
What if it was easier than ever to access this valuable information without the need to constantly reach for your phone?
Imagine a scenario where you're out for a run, deep into a workout, or simply going about your daily activities.
With a quick glance at your wrist, you have immediate access to your sensor glucose levels and trend data.
It's not just a dream; it's a reality waiting to be unlocked.
In this comprehensive step-by-step guide, we will empower you to seamlessly sync your Continuous Glucose Monitor (CGM) data with your smartwatch,
providing you with real-time glucose readings.
Whether you're using a Dexcom G7, G6, or ONE, a FreeStyle Libre 3 or 2, or a Guardian 4 sensor,
we have tested and streamlined the process for you with for Garmin smartwatch, Samsung Galaxy Watch and Apple Watch.
Get Access To Updated Diabetes Technology Courses
Join us on this journey as we make the dream of having your glucose data readily available on your wrist a reality.
No more constantly checking your phone –
it's time to take control of your diabetes management and enjoy the convenience of real-time glucose information at your fingertips.
Disclaimers
- Any brand of smartwatch may display some alerts, even if it isn't set up with your CGM. On your smartwatch lock screen, you can tap OK to acknowledge the alert. That will also acknowledge the alert in your CGM app. This article is focused on getting the glucose readings itself on the watch and not only the alerts.
- It's worth noting that while the future holds the promise of a direct connection between your smartwatch and CGM, this feature is not yet available at the time of this article (Feb 2024). Therefore, all the discussed options will still require you to have your phone with you to receive your sensor data on your smartwatch.
- While certain companies offer native integration of their apps with smartwatches, the options we'll be discussing also involve the use of open-source apps like xDrip+ and derivatives thereof. Please be aware that these open-source apps are not supported by any company or medical autority. Their use is at your own risk. Our intention is to inform you about these options, not necessarily endorse them.
- The process for configuring your CGM data on your smartwatch may vary depending on the specific phone-smartwatch combination you possess. We have meticulously tested the outlined options below using the following smartwatches: Garmin Venu Sq 2, Galaxy Watch 4, and Apple Watch SE. It's likely that more advanced models will also be compatible.
- If the provided instructions appear challenging to follow, there's no need to worry. It often becomes much simpler when you have your devices with you and can follow along in real-time.
1) DEXCOM G7
Start the Dexcom G7 sensor with the official Dexcom G7 app and activate your Dexcom Share account by adding a follower (this can be yourself).
You only need to register a follower through the Dexcom mobile app, the follower does not need to take any additional actions.
1.1) Dexcom G7 >> Garmin smartwatch
To view your Dexcom G7 glucose data on your Garmin watch, follow these steps:
- Install the Garmin Connect IQ Store app on your phone.
- In the Garmin Connect IQ Store app, search for "Dexcom", and select the "Dex CGM Watch Face" from the search results. If your Garmin watch is connected to your phone, you can proceed to install the watch face. You can find a tutorial on how to do this here.
- Configure the Dex CGM Watch Face by entering your Dexcom username and password in its settings. If the watch face doesn't automatically appear on your Garmin watch, you can manually select it from the available watch faces. You can find a tutorial specifically for the Garmin Venu watch here.
- Another option is to install a Dexcom Widget from the Connect IQ store. Tapping on the Dexcom Widget will display your glucose trend graph on your watch.
- Alternatively, you can install a Dexcom Datafield via the Connect IQ Store. This allows you to view your sensor value while engaging in activities on your watch. If you have a Garmin Edge cycling computer, you can also use the Dexcom Datafield feature to display Dexcom data on it.
1.2) Dexcom G7 >> Samsung Galaxy smartwatch
To access your Dexcom G7 glucose data on your Samsung Galaxy Watch or another smartwatch with Wear OS, follow these steps:
(You can find a full tutorial for this process here and a shorter version here.)
- Access the App Store on your Galaxy Watch and search for the "Blose" app.
- Download and install the Blose app on your Galaxy Watch.
- Configure the Blose app by following the provided instructions. This entails signing in to your Dexcom Clarity account via your connected phone.
- You can customize various settings such as glucose units, glucose target values, alert preferences, and the appearance of the watch face.
- Search for and install the Blose watch face from the available options provided within the app.
- Once installed, you will be able to view your Dexcom G7 sensor data directly on your Samsung Galaxy Watch.
1.3) Dexcom G7 >> Apple Watch
The Dexcom G7 app includes an Apple Watch app.
- If the watch app hasn't been automatically installed, you can manually install it by accessing the Watch app on your iPhone.
- On your Dexcom G7 app of your Apple Watch, you can conveniently monitor your current glucose levels, observe the trend arrow, and view your glucose graph from the past 3 hours. You can zoom in and out by tapping or swiping on the screen.
- To quickly access the G7 app from your watch, consider adding a watchface complication. This allows you to open the app with a simple tap on the complication.
- Please note that these Dexcom G7 watchface complications are only compatible with specific watch faces. For instance, you can use the Infograph Modular watch face and place the Dexcom Complication in one of the available complication positions. You can find a demonstration on how to do this here and here.
- Keep in mind that Apple Watch complications update information at intervals of 15-45 minutes. Tapping the complication will display a larger Dexcom sensor graph with the most recent blood glucose reading.
2) DEXCOM G6
Start the Dexcom G6 sensor with the official Dexcom G6 app and activate your Dexcom Share account by adding a follower (this can be yourself).
2.1) Dexcom G6 >> Garmin smartwatch
To view your Dexcom G6 glucose data on your Garmin watch, follow these steps:
- Install the Garmin Connect IQ Store app on your phone.
- In the Garmin Connect IQ Store app, search for "Dexcom", and select the "Dex CGM Watch Face" from the search results. If your Garmin watch is connected to your phone, you can proceed to install the watch face. You can find a tutorial on how to do this here.
- Configure the Dex CGM Watch Face by entering your Dexcom username and password in its settings. If the watch face doesn't automatically appear on your Garmin watch, you can manually select it from the available watch faces. You can find a tutorial specifically for the Garmin Venu watch here.
- Another option is to install a Dexcom Widget from the Connect IQ store. Tapping on the Dexcom Widget will display your glucose trend graph on your watch.
- Alternatively, you can install a Dexcom Datafield via the Connect IQ Store. This allows you to view your sensor value while engaging in activities on your watch. If you have a Garmin Edge cycling computer, you can also use the Dexcom Data Field feature to display Dexcom data on it.
2.2) Dexcom G6 >> Samsung Galaxy smartwatch
To access your Dexcom G6 glucose data on your Samsung Galaxy Watch or another smartwatch with Wear OS, follow these steps:
(You can find a full tutorial for this process here and a shorter version here.)
- Access the App Store on your Galaxy Watch and search for the "Blose" app.
- Download and install the Blose app on your Galaxy Watch.
- Configure the Blose app by following the provided instructions. This entails signing in to your Dexcom Clarity account via your connected phone.
- You can customize various settings such as glucose units, glucose target values, alert preferences, and the appearance of the watch face.
- Search for and install the Blose watch face from the available options provided within the app.
- Once installed, you will be able to view your Dexcom G6 sensor data directly on your Samsung Galaxy Watch.
2.3) Dexcom G6 >> Apple Watch
The Dexcom G6 app includes an Apple Watch app.
- If the watch app hasn't been automatically installed, you can manually install it by accessing the Watch app on your iPhone.
- On your Dexcom G6 app of your Apple Watch, you can conveniently monitor your current glucose levels, observe the trend arrow, and view your glucose graph from the past 3 hours. You can zoom in and out by tapping or swiping on the screen.
- To quickly access the G7 app from your watch, consider adding a watchface complication. This allows you to open the app with a simple tap on the complication.
- Please note that these Dexcom G7 watchface complications are only compatible with specific watch faces. For instance, you can use the Infograph Modular watch face and place the Dexcom Complication in one of the available complication positions. You can find a demonstration on how to do this here and here.
- Keep in mind that Apple Watch complications update information at intervals of 15-45 minutes. Tapping the complication will display a larger Dexcom sensor graph with the most recent blood glucose reading.
3) DEXCOM ONE
Unfortunately, there's no direct way to sync Dexcom ONE transmitter data with your smartwatch. You can however transform your Dexcom ONE sensor into a Dexcom G6 sensor. This option gives you the capability to transmit your sensor data to your smartwatch, as described in the previous section.
Here are the steps to do this:
- Purchase an official Dexcom G6 transmitter or an Anubis transmitter. You can purchase Anubis transmitters for 125 euros by filling out this form, support is available via the Followers of Anubis Facebook group.
- Dexcom ONE sensors can be used with G6 transmitters and vice versa. However, the calibration code used must be converted to a different value when your sensor and transmitter are not of the same type. You can find a conversion table here.
It's important to note that the use of Anubis transmitters and converting calibration codes is not supported by Dexcom or approved by any medical authorities. These methods are at your own risk.
4) FREESTYLE LIBRE 3
Start the FreeStyle Libre3 sensor with the official FreeStyle Libre3 app and create a LibreLinkUp account by adding a follower (this can be yourself, but you'll need to use another email adress). If you use the Juggluco app, you can also start the sensor directly within the Juggluco app.
4.1) FreeStyle Libre 3 >> Garmin smartwatch
Here are the step-by-step instructions for getting your FreeStyle Libre 3 sensor data on your Garmin smartwatch, or any watch that connects to Juggluco.
- Download the Juggluco app via the Androidaps documentation site and follow the directions to get the FreeStyle Libre 3 sensor data on the Juggluco app.
- Tap on the left side of the Juggluco to open the left menu, open the Watch menu, and toggle on Kerfstok. In the status of Kerfstok, you can toggle on "glucose".
- Install the Garmin Connect IQ Store app on your phone, and download the Kerfstok app.
- If your Garmin watch is connected to your phone, you can open the Kerfstok app and choose for Watch face. This Watch Face like screen shows the current time, date, battery level, heart rate, glucose level and glucose trend. You can find more information here and here.
4.2) FreeStyle Libre 3 >> Samsung Galaxy smartwatch
Here are is a 3-step instruction for getting your FreeStyle Libre 3 sensor data on your Samsung Galaxy Smart watch, or other smartwatches that work with Wear OS.
(You can find a tutorial about the first 2 steps here in text and here in video, and here is a tutorial for the last step.)
- Install the LibreLinkUp app and register as a follower within your FreeStyle Libre 3 app, using a different email address than the one associated with your LibreView account. After completing this step, you will have two separate accounts: one for logging into the Libre 3 app, referred to as a LibreView account, and another for accessing the LibreLinkUp app, known as a LibreLinkUp account. Once you log in to LibreLinkUp with your LibreLinkUp account, you will start receiving readings from your FreeStyle Libre 3 sensor.
- Install the Gluroo Diabetes Logger app from the Play Store. To link your FreeStyle Libre 3 sensor as a CGM data source in Gluroo: Open the app and press the hamburger button in the top right corner. Select "CGM." Choose "Freestyle Libre via Link-Up." Enter your LibreLinkUp username and password. And press "Connect" to establish the connection.
- On your Wear OS watch: Navigate to the Google Play Store on your watch. Search for "Gluroo" and install the Gluroo app. Return to your watch's home screen, long-press on it to access customization options. Swipe to the right to add a new watch face. In the list of watch faces, choose “Big Info” or “Analog dashboard”. Tap "customize", then swipe to the left to select a “complication”. Select the complication you want to change and pick "BLG via Gluroo". After a short wait, you will see your FreeStyle Libre 3 glucose value and glucose trend on your watch. If you tap on the complication, you can see a full glucose graph.
4.3) FreeStyle Libre 3 >> Apple Watch
Here are step-by-step instructions for syncing your FreeStyle Libre 3 sensor data with your Apple Watch: (you can find a full video tutorial here)
- Begin by installing the LibreLinkUp app and registering as a follower within your FreeStyle Libre 3 app, following the same process as discussed for the Galaxy Watch. Ensure that your sensor glucose readings are visible within the LibreLinkUp app.
- Next, head to the Apple Store, install the Gluroo Diabetes Logger app. Link your FreeStyle Libre 3 sensor as a Continuous Glucose Monitoring (CGM) data source, using the same steps as discussed for the Galaxy Watch.
- Once connected, you can go to the “Data tab”, tap “Other formats for apps”, locate the Nightguard link and copy it, using the copy button.
- Download the Nightguard app from the Apple Store. Inside the app, tap on "More," then select "Preferences." Input the Nightguard link obtained from Gluroo where it prompts you for a Nightscout URL. After this step, you should be able to view your FreeStyle Libre 3 sensor data in your Nightguard app.
- On your Apple Watch, navigate to a modular watch face and tap and hold on the watch face to access customization options. Choose one of the complications, and then select a Nightguard complication, either "BG Values as Gauge" or "BG Values as Text." When you tap on the Nightguard complication, you can view your complete glucose curve. You can scroll through the curve using the dial. It's worth noting that there might be a slight delay of about 5 minutes between the FreeStyle Libre 3 sensor readings and the values displayed on the watch.
5) FREESTYLE LIBRE 2
Start the FreeStyle Libre 2 sensor with the official LibreLink app.
After the warmup time (1 hour) you'll need to disconnect the sensor from the LibreLink app. You can do this by turning off the alarms in the LibreLink app and toggling off the Bluetooth connection of the LibreLink app in the Bluetooth settings. It might be necessary to force close the app.
Now you can scan the sensor with an xDrip-like app (like Juggluco, Diabox or Shuggah). This will enable real-time CGM functionality with your FreeStyle Libre2 sensor.
It's important to note that these apps do not send sensor data to LibreView (except for Juggluco). If you want a full graph in LibreView, you will still need to scan your FreeStyle Libre2 sensor with the LibreLink app every 8 hours.
5.1) FreeStyle Libre 2 >> Garmin smartwatch
Here are step-by-step instructions for syncing your FreeStyle Libre 2 sensor data with your Garmin smartwatch:
- Download the Diabox app on your phone by surfing to diaboxapp.com. Configure the app to share data with smartwatches in the settings menu (settings > integrations > toggle on "share data with smartwatches").
- Download the xDrip+/Spike/Nightscout Watch Face from the Garmin Connect IQ store and install it on your Garmin watch. You can find a tutorial on how to do download a new watch face here, and more instructions on this specific watch face here.
- Alternatively, you can download the xDrip+/Spike/Nightscout Widget or Datafield from the Connect IQ store to view your Libre2 sensor data in a widget or during an activity.
- If you have a Garmin Edge cycling computer, you can utilise the xDrip+/Spike/Nightscout Datafield feature to display Libre2 data on it.
5.2) FreeStyle Libre 2 >> Samsung Galaxy smartwatch
Here are step-by-step instructions for syncing your FreeStyle Libre 2 sensor data with your Samsung smartwatch:
- Download the Diabox app from diaboxapp.com and configure it to share data with GWatch. You can find more information here.
- Install the G-Watch Wear app on both your phone and your smartwatch. Set Diabox as the data source in the app settings. You can find a tutorial for using this app here, and more information for customizing the watch face here.
- You can use the Wearable Widgets app in conjunction with the G-Watch Wear app to display Libre2 data as a complication or a tile on your Samsung Galaxy smartwatch. You can find tutorials on how to set up and use the Wearable Widgets app here and here.
5.3) FreeStyle Libre 2 >> Apple Watch
Here are step-by-step instructions for syncing your FreeStyle Libre 2 sensor data with your Apple Watch.
If you use European FreeStyle Libre 2 sensors, you can use the Shuggah app:
- Download the Shuggah app from the App Store on your iPhone and scan the sensor using the Shuggah app.
-
Open the Watch app on your iPhone: find the Shuggah app and install it on your Apple Watch.
-
Once installed, you can access the Shuggah app on your watch by finding it among the app icons. Tapping on the Shuggah app will display your Libre sensor glycemia and treand arrow.
-
To have easier access to your glucose data, you can integrate the Shuggah logo as a complication on a modular watch face.
- If you prefer to view your glucose data in real-time without tapping on your watch, you can configure the Shuggah app to create calendar events. Simply go to the app settings and toggle on the "create calendar events" option. You can find a tutorial here for more detailed instructions. On a modular or photo watch face, you can change the middle complication to "my calendar" to see your real-time sensor data.
- Please note that the Shuggah app utilizes its own algorithm to calculate blood glucose readings, which may result in slight differences compared to your Libre 2 readings.
If you use US FreeStyle Libre 2 sensors, the Shuggah app won't work. You could use the following method. (Here is a full video tutorial.)
- Begin by installing the LibreLinkUp app and registering as a follower within your FreeStyle Libre 2 app, using a different email address than the one associated with your LibreView account. After completing this step, you will have two separate accounts: one for logging into the LibreLink app, referred to as a LibreView account, and another for accessing the LibreLinkUp app, known as a LibreLinkUp account. Once you log in to LibreLinkUp with your LibreLinkUp account, you will start receiving readings from your FreeStyle Libre 2 sensor.
- Next, head to the Apple Store, install the Gluroo Diabetes Logger app. To link your FreeStyle Libre 2 sensor as a CGM data source in Gluroo: Open the app and press the hamburger button in the top right corner. Select "CGM." Choose "Freestyle Libre via Link-Up." Enter your LibreLinkUp username and password. And press "Connect" to establish the connection.
- Once connected, you can go to the “Data tab”, tap “Other formats for apps”, locate the Nightguard link and copy it, using the copy button.
- Download the Nightguard app from the Apple Store. Inside the app, tap on "More," then select "Preferences." Input the Nightguard link obtained from Gluroo where it prompts you for a Nightscout URL. After this step, you should be able to view your FreeStyle Libre 2 sensor data in your Nightguard app.
- On your Apple Watch, navigate to a modular watch face and tap and hold on the watch face to access customization options. Choose one of the complications, and then select a Nightguard complication, either "BG Values as Gauge" or "BG Values as Text." When you tap on the Nightguard complication, you can view your complete glucose curve. It's worth noting that there might be a slight delay of about 5 minutes between the FreeStyle Libre 2 sensor readings and the values displayed on the watch.
6) GUARDIAN 4
To enable smartwatch connectivity for the Guardian sensor with a MiniMed 780G insulin pump, you'll need to download the MiniMed Mobile app and connect it with your MiniMed 780G insulin pump.
6.1) Guardian 4 >> Garmin smartwatch
Here are step-by-step instructions for syncing your Guardian sensor data with your Garmin smartwatch:
- Download the xDrip+ app from github.com/nightscoutfoundation/xdrip. You can find a video on how to download the app here.
- Set the data source of xDrip+ to "Companion App" in the settings. This will allow xDrip+ to receive sensor data from the MiniMed Mobile app.
- Download the xDrip+/Spike/Nightscout Watch Face from the Garmin Connect IQ store and install it on your Garmin watch. You can find a tutorial on how to do download a new watch face here, and more instructions on this specific watch face here.
- Alternatively, you can download the xDrip+/Spike/Nightscout Widget or Datafield from the Connect IQ store to view your Guardian sensor data in a widget or during an activity.
- If you have a Garmin Edge cycling computer, you can utilise the xDrip+/Spike/Nightscout Datafield feature to display Guardian data on it.
6.2) Guardian 4 >> Samsung Galaxy smartwatch
Here are step-by-step instructions for syncing your Guardian sensor data with your Galaxy smartwatch:
- Download the xDrip+ app from github.com/nightscoutfoundation/xdrip. You can find a video on how to download the app here.
- Set the data source of xDrip+ to "Companion App" in the settings. This will allow xDrip+ to receive sensor data from the MiniMed Mobile app.
- Adjust the settings within the xDrip+ app to send data to the G-Watch App as explained here.
- Install the G-Watch Wear app on both your phone and your smartwatch. Set xDrip as the data source in the app settings. You can find a tutorial for using this app here, and more information for customizing the watch face here.
- You can use the Wearable Widgets app in conjunction with the G-Watch Wear app to display Guardian data as a complication or a tile on your Samsung Galaxy smartwatch. You can find tutorials on how to set up and use the Wearable Widgets app here and here.
6.3) Guardian 4 >> Apple Watch
Here are step-by-step instructions for syncing your Guardian sensor data with your Apple Watch:
(You can watch the full tutorial here.)
- The MiniMed Mobile app includes a native Apple Watch app. Ensure that you have the latest version of the MiniMed Mobile app installed on your iPhone. Check if the MiniMed Watch app is mentioned in the settings of the app.
-
Open the Watch app on your iPhone and locate the MiniMed Mobile app among the available apps. Install the MiniMed app on your Apple Watch.
- Once installed, you can access the MiniMed app on your Apple Watch by finding it among the app icons. Tapping on the MiniMed app will display your glycemia within your SmartGuard shield. Swiping to the left will show your sensor graph and Time In Range.
-
To have easier access to your glucose data, you can integrate your sensor glucose value and SmartGuard Shield as a complication on compatible watch faces. These watch faces include Portrait, Nike (hybrid), Breathe, Utility, Simple, Photos, Motion, Gradient, XL, and Astronomy. Clicking on the complication will allow you to access the full MiniMed Watch app.
Important Considerations
Setting up a connection between your phone and smartwatch may require patience and experimentation. Connectivity issues can arise, especially with updates to the operating systems of your devices. Sensor companies may also modify their software, rendering certain integrations no longer possible.
To navigate these challenges, consider joining online communities on platforms like Facebook, Discord, or Telegram. Connecting with peers can provide valuable support and assistance when encountering difficulties!
If you are not comfortable using unapproved apps at your own risk, an alternative approach is to set alarms as notifications on both your phone and smartwatch.
For exercise routines, adjusting your low alert to a higher threshold, such as 90-100 mg/dL (5-5.5 mmol/L) instead of the standard 70 mg/dL (3.9 mmol/L), can help ensure timely notifications for consuming necessary carbohydrates. This simpler setup can also be beneficial for preserving the battery life of your phone and smartwatch.
With this comprehensive step-by-step guide, you can access your CGM data on your smartwatch, enabling better diabetes management. While Dexcom and Medtronic offer some native integration, users of other CGM brands can still enjoy similar functionality using open-source apps. Prioritize safety, consult your healthcare provider, and stay empowered with real-time glucose readings at your fingertips.
Good luck!
If you'd like a handout to easily give to patients to further explore these options, you can download a printable PDF of this step-by-step guide HERE.
Kind regards,
![]()